
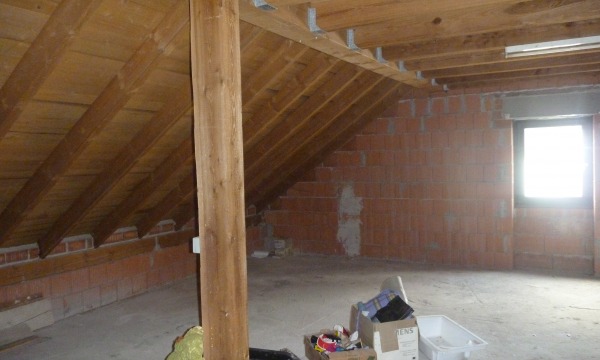
To be able to make good use of your loft, you need to have a reasonable amount of available floor space and headroom. This is determined by the type of roof structure you have. If your house was built after 1965, it is quite likely that the roof was built using “trussed rafters”, creating a network of timbers criss-crossing the loft. The bad news is that you can’t easily alter this type of roof and a loft conversion might be out of the question without replacing or supporting the roof structure. Sorry!
If your roof is of more traditional “rafter and purlin” construction, where a large beam (or “purlin”) runs horizontally along the roof about half way up to support the roof rafters, this is a better option for conversion. A steeper roof pitch will be another advantage, allowing more headroom. For comfortable use, you really need a minimum height of 2.3m (7’6″) available over half the floor area for a bedroom, playroom or study. If you are short of headroom, creating a dormer window will probably help to increase your useable space. There are no rules to say how small a loft room can be – if you only have space to create a small office or study, then that is entirely up to you (provided it meets all the current UK Building Regulations. We’ll look at this in Part 4 of the guide).
OK, so you’ve looked at the roof structure and are happy with the floor space, now you need to consider the floor structure. The existing ceiling joists that form the loft floor were only put in to support your first floor ceilings and will probably not be strong enough to carry floor loads. So new floor joists might have to be installed. Look to see where the water tank is standing, as this may have to be repositioned. If you have a really comfortable headroom, you may be able to create a storage space above the new loft room ceiling which could house the water tank. If so, remember to take the weight of the tank into account in any structural calculations.
While you are examining your loft, take time to look at the condition of the structure. Check the supporting walls, timbers and the underside of the roof covering for any obvious signs of defects or damage and look to see where electricity cables are laid. If there are any problems, these will have to be remedied as part of the conversion project. Just stand for a while and start to get a feel for the room you will be creating and consider the best position for windows and stairs. We will be looking at this in detail later in the series.
Now that you have assessed your roof construction, size and condition, it’s time to think in more detail about access from the floor below. And we’ll tackle this in the next Part.
If you’d like advice about a potential loft conversion project, it’s a good idea to pop along to the Building Control Department of your local council and they should be happy to help. We’ll also look at where to go for help and advice later in the guide.
[Image courtesy of Velux.co.uk]